The Battle of Falkirk: English Ascendancy
In the wake of a succession that precipitated the power struggle known as the Great Cause, Scotland had allowed England's King Edward I to play kingmaker and, when it proved convenient, removed his chosen king, John Balliol, and placing himself on the equivalent of the Scottish throne. 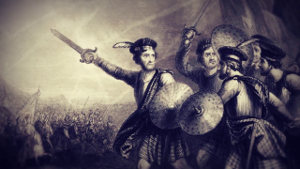
The Scottish response was outrage, especially after Edward had sacked Berwick-upon-Tweed, and the Scots began to fight back. Organizing the resistance were Andrew Moray and William Wallace. The Scottish forces were successful at seizing large amounts of territory and then achieved the near-impossible, facing down a contingent of English heavy cavalry at the Battle of Stirling Bridge in 1297. That smashing victory was, in fact, a rout, one that inspired Scotland to further acts of patriotic defiance and enraged the English king into another round of army-building. In the early summer of 1298, yet another English army headed north. Wallace had wasted no time, ravaging the English countryside and even storming into Northumbria. Edward responded by assembling an army of 15,000 English, Irish, and Welsh troops. They mustered at York and moved toward Roxburgh Castle. Wallace, with a much smaller force, opted not to confront the English but to pursue a scorched-earth policy. Edward took Dirleton Castle and then reached Linlithgow. They were seriously short of supplies in late July yet chose to move quickly when they had news that Wallace and the Scottish army were nearby. The two armies met on July 22. Estimates are that the Scottish force was, at best, half the size of the English force. Edward deployed his very large force in the usual way, with armored knights and other nobility atop armored horses, ready to mow down any Scottish infantry foolish enough to stand in their way. A large contingent of English infantry was on hand as well. Wallace had won the day at Stirling Bridge by having geography on his side. This was the case to an extent at Falkirk as well. Historians to this day cannot agree on exactly where this pivotal battle was fought, but the most likely places are all relatively open areas, with no narrow bridges to constrain an attacking army and no river to prevent retreat. Accounts of the battle speak of Wallace's ability to choose the ground for the fight. The Scottish force lay in wait on firm ground, with a stream and bog in front, ideally forcing any attack to a slog. The English, aware of the dangers of the stream and the bog, attacked anyway. The ground underfoot was nowhere near conducive to a sustained heavy cavalry attack, but the English forces advanced anyway. 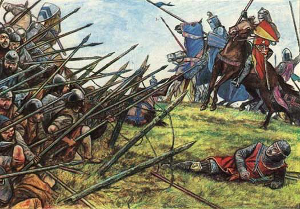
To counter the English heavy cavalry, the Scottish army deployed its force in the form of a schiltron, a grouping of men carrying long spears that resembled nothing so much as a giant hedgehog. A layer of carved wooden stakes surrounded each schiltron, and between each of the four schiltrons was a force of Scottish archers. Any horsemen who charged the schiltron would find their mounts threatened by the spears–provided that the soldiers wielding those spears did not break ranks and flee under the threat of the cavalry charge. They did not. The English infantry was unable to make a dent, either. 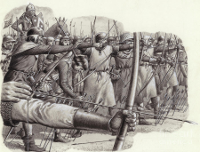
The English army didn't need to retreat at Falkirk because Edward, seeing the success of the schiltron, employed his secret weapon, a large contingent of longbowmen. Wave after wave of deadly arrows rained down on the Scottish army, who could defend only with shield and spear. Neither proved adequate in the end, and Scots were killed by the thousands. The usual method of scattering archers was to send cavalry after them, and the Scottish forces did start the day with a small force of cavalry. When they were needed most, however, they were nowhere to be found. The English had won the day. Wallace escaped and fled into hiding. Edward exulted in his victory. |


|
Search This Site

Custom Search
|
Social Studies for Kids
copyright 2002–2026
David White